WINTER AND SNOW PHOTOGRAPHY

Winter can be a photographer’s wonderland and shooting in winter can be quite enjoyable. However, there are some undeniable factors you need to be aware of such as the influence of the bright white snow and sunlight glare has on your exposure meter. 

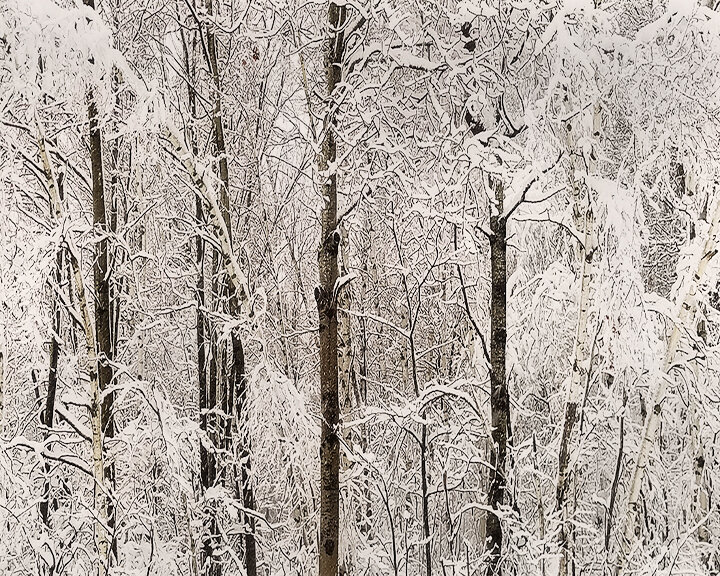
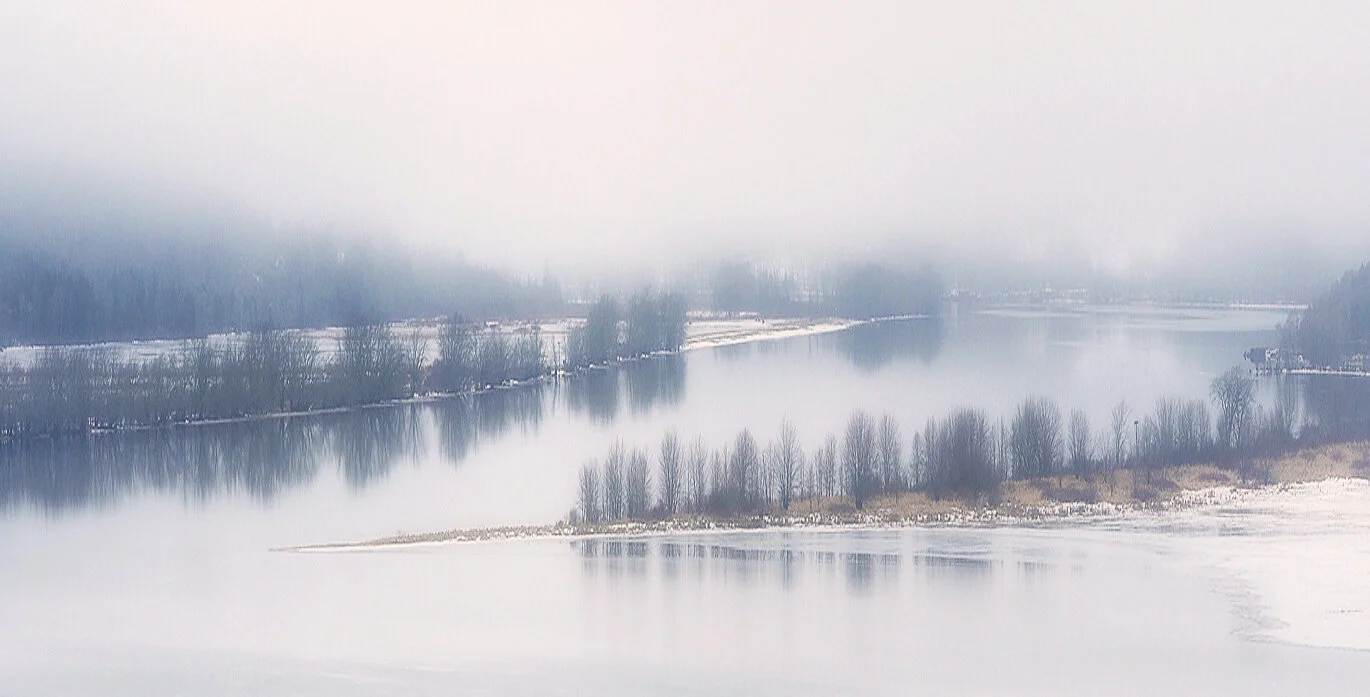
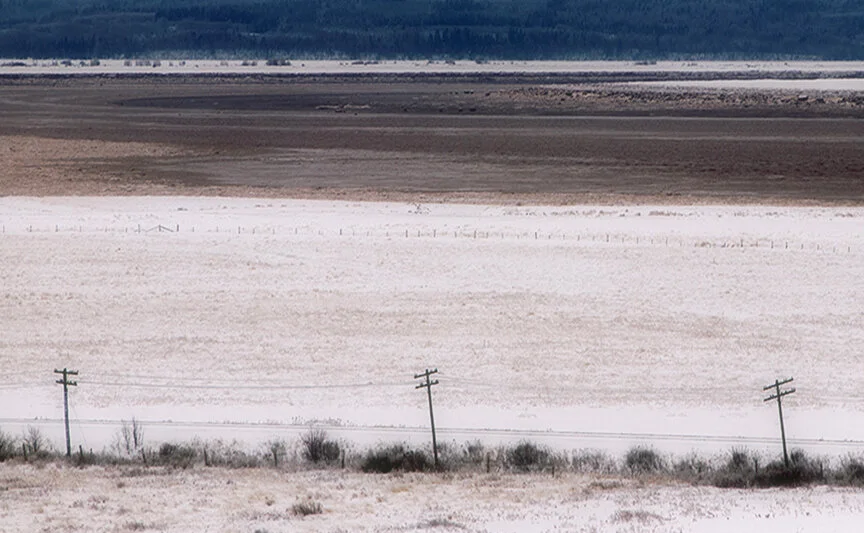
Most people who relish in the awe-inspiring beauty of fall colours often become completely lost in the “fall is over and now what do I photograph?” mode. With that said, I personally think that there isn’t anything quite as magical and spectacular as a fresh snowfall blanketing a landscape.

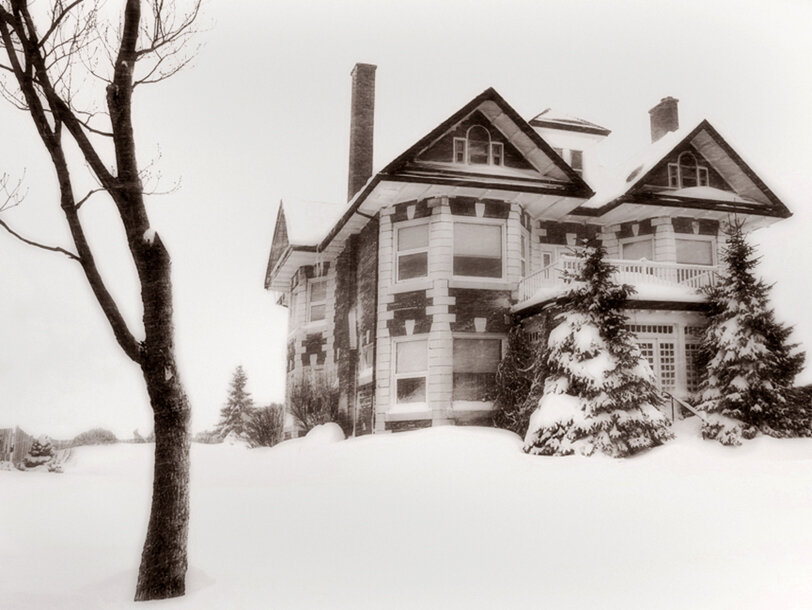
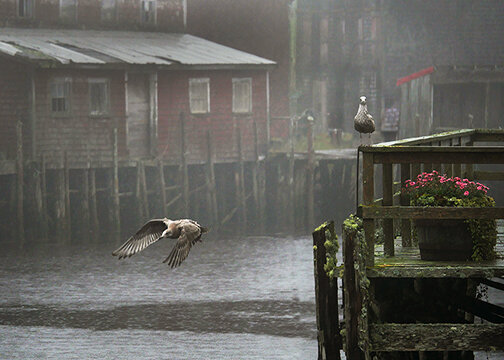
Snow can be an inspiring photographic subject, whether you’re photographing mountain landscapes or abandoned barns in a storm. However, snow is also challenging to photograph and many photographers find that the bright snow scene in front of their lens unexpectedly turns into a gloomy gray image once the shot is made.

This article illustrates why that happens and how to correct it for fantastic snow photos during the winter season. 

Here is a list of tips for winter and snow photography that will help you take incredible photos and protect your camera equipment.

004.jpg

PROTECT YOUR EQUIPMENT

While this may not be a photo capturing tip, a serious photographer is prepared at all times for any and all conditions. It’s essential to keep your equipment protected, dry and operating at its optimal capacity because without that, these tips will not be of much use.

Taking Care Of Your Gear

Any kind of cold weather conditions call for added care when it comes to camera equipment. Without appropriate care and planning, not only can your shooting time be cut short, but it can also negatively impact the life expectancy of your kit. However, there are some fairly easy and economical ways to keep your camera gear going the distance in chilly conditions.

 The Camera

It’s actually quite remarkable how digital cameras perform well in cold temperatures. I have never had mechanical difficulties with any of my SLR’ s, in temperatures down to -32 C. The battery will continually be the weakest link in the system and you will need to keep a close eye on the power gauge. When it gets low, change the battery for a warm one (I usually have two spares inside my jacket). Once the cold battery is warmed up, it will recoup most of its charge and will be good to use again. In extremely low temperatures, the LCD screen on top of the camera will become sluggish and sooner or later totally fade out. Luckily, the rear display screen is immune to this issue, so you can use it to monitor and adjust your settings.

  Tip 1: I use a cable release and stuff it inside my left glove. That way, I can operate the camera shutter with warm fingers.

Tip 2: Composing your image can be quite tricky if you are looking through the cameras viewfinder. If you unintentionally breathe on it, your lovely scene will be swapped with a frosty cloud of fog or ice that will remain for quite a while. I carry some Q-tips in a plastic bag in case I have to deal with that problem.

Tip 3: A lens hood is advised for winter photography. It will significantly reduce sun glare shining on the glass as the sun reflects on the bright white snow, thus resulting in clearer and more saturated photos. Be mindful of snow that might gather inside a lens hood in windy conditions.

 Tripod

An additional piece of camera equipment that many don’t consider is the tripod. Chances are that your tripod is made of aluminum or carbon fiber, both get extremely cold in freezing conditions. This can make holding the tripod quite unpleasant, especially if you are carrying it barehanded, which is something I sincerely do not advise. Buying foam-insulated wraps that cover each tripod leg is a great and economical investment. They make it more comfortable to rest your tripod on your shoulder while wandering around. These wraps will also make holding and manipulating it far more tolerable in freezing temperatures. I can vouch that it is one of the best investments I have made as a photographer.

002.jpg

POST-SHOOTING PRECAUTIONS

Let’s talk about equipment safeguards to use post-shoot. After being in the cold photographing for hours, you are now longing to cozy up in a warm room with a hot cup of tea, hot chocolate or maybe something stronger.

More than likely, you will want to examine the photos you just took. It’s vitally important that you ensure the safety of your photos as well as that of your gear.

Before you settle in, make sure you take the proper steps in order to allow your camera gear to acclimatise itself to the abrupt change in temperature.

The first step is to remove all media cards from your camera and place them in a dry, safe place such as a plastic case or a bag that you keep in your pocket. You must do this before going inside with your gear. I assure you that condensation will likely form the second you walk in and you do not want to mess around with media cards when that takes place. Then, bring your camera and lenses using some simple yet important gear saving steps.

As you can expect moisture of any kind can be detrimental to lenses and cameras and should be avoided as best as possible. To remedy this issue, I strongly recommend sealing each camera and lens in its own air-tight plastic bags, like Ziploc bags, before heading into a warm environment. Doing so will allow for any condensation to form on the bag instead of on your camera gear. You’ll want to keep your equipment sealed in these bags for a few hours, until they reach room temperature. Also, tossing a few silica gel packs in your camera bag, to further absorb any moisture from melting snow or condensation would be extra insurance against moisture.

005.jpg

EXPOSURE COMPENSATION

Exposure compensation is especially important and the simplest way to get around your camera’s propensity to underexpose bright subjects and overexpose dark ones. 

Your camera’s metering system thinks that everything it sees reflects 18% of the light. Of course, snow reflects a lot brighter than 18% gray, the camera will meter for gray, not white.

You will want to overexpose when it comes to snow photography to counteract for your camera’s meter system which will adjust for middle grey. If you do not compensate, the snow is likely to appear grey instead of pure white. 

When shooting on an automatic mode (P – AV or A – TV or S) moving your exposure compensation dial by +1 to +2 stops will end up giving you white snow. You will want to experiment with adding more exposure, anywhere from +1/3 to +2 stops exposure compensation, so play around until you find what you like.

So how do you accurately meter in snowy environments? Here are four tips to guide to get great exposures when shooting in snow.


009.jpg

Manually compensate your metering

When you meter snowy scenes, you can be certain that most likely your meter will underexpose. Consequently, what you will need to do is compensate by adding some additional stops, in other words adding more light.

Here are some general guidelines that you can use in different weather conditions:

Snow and weather conditions                        EV Compensation (EV = Exposure Value)

Snow with clear sunny skies                           +2 to 3 EV.

Snow with slight overcast                               +1 to 2 EV.

Snow with overcast or in open shade            +2/3 to 1 EV.

For example, if you want to compensate by +1 stop and your meter tells you that at f/11 your shutter speed should be at 1/800, slow down the shutter to 1/400 sec or open up the aperture to F/8. Choose one or the other, shutter speed or aperture.

Notice highlights

Another challenge with snow is that any white subject photographed in relatively bright light is at danger of losing detail with overexposure. Once a scene has overexposed highlights, there is usually not much that can be done in editing to bring back the lost detail. So, avoid these disastrous ‘blown out’ highlights.


009.jpg

Histograms

A histogram is a graph that illustrates the distribution of pixel brightness in each image. It is visible on the rear LCD screen when the camera is on Live View or in playback, it is a useful way to evaluate exposure.

Histograms are mountain-shaped graphics; the height of each peak indicates how many pixels were recorded at particular brightness levels. The most important part, however, is how the display looks side-to-side. The left side of the chart represents shadow tones and the right side represents bright highlight areas and the center represents mid-tones. 

020.jpg

 White balance

The White Balance (WB) adjusts the hue for the light source you are shooting in, to end up with a natural colour rendering of the scene. Many photographers simply let the camera adjust this automatically, with Auto White Balance (AWB). Personally, I prefer the fixed, pre-set white balance settings, such as Daylight, Cloudy, Shade, and Tungsten. The pre-set White Balance options are quite precise, but you have to keep in mind to use the one that is the closest fit to the light source and weather conditions.

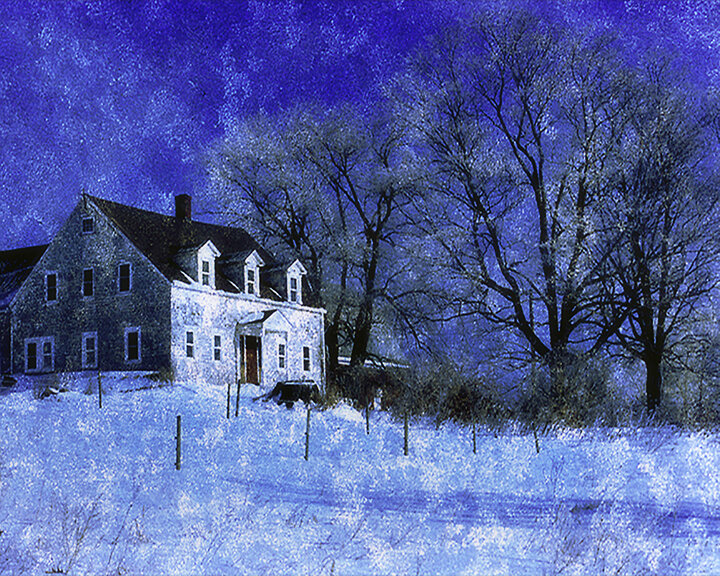
For example, on sunny days with clear blue skies and no cloud diffusion snow will pick up the blue tint of the sky. Experiment with the Cloudy or Shade settings to warm-up the overall colour to offset that blue colour cast.

006.jpg

FINAL THOUGHTS

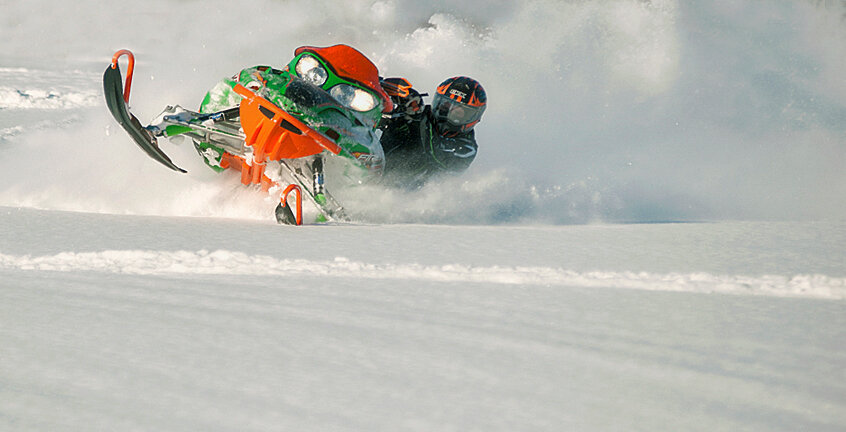
The winter season can be a spectacular time to go outside and grow your photographic collection. When the ground is shrouded in a layer of white, even familiar surroundings can become completely different scenes and give many new opportunities to create exceptional images.

Winter being a season that presents specific challenges that photographers don’t have to contend with in other seasons, it is my heartfelt hope that this article has offered some valuable tips. With years of photography in all seasons, I have acquired some experience that I enjoy sharing to help make your photo outings more pleasurable. During this beautiful winter season, it is my desire that you will learn, grow and be happy with beautiful “white” images.

Keep in mind that you will need to experiment, practice and have fun while creating and building your winter images.

CREATING SILHOUETTES IN STREET PHOTOGRAPHY

THE IMAGES BELOW ARE ALL STUDIES IN UNDERSTANDING ‘LIGHT’ AND ‘SHADOWS’.

Creating silhouettes in photography is a terrific way to add visual drama or impact in your street imagery. The contrast and absence of detail in a subject produces a mystery which can be quite pleasing for the viewer. They are not complicated to create and enjoyable to seek out when you’re out with your camera.

The crucial element to creating a successful and interesting silhouette is that you must have the subject in focus. The simpler the subject the better, when looking for great silhouettes. Keep in mind, the important thing is that you need a defined shape because you will not have much visible features on your main subject. Outlines of bodies, hats or identifiable items are always a benefit.

Street photography can be quite thrilling, I appreciate the spontaneity and honesty of it. It is unscripted, unplanned and immediate. It is to capture a moment of everyday life, an expression or a situation in real time in a fraction of a second. With the click of the shutter, a street image is formed, one that has never been viewed before and will likely never be seen again.
When I photograph, I get into a very calm state of mind… In other words, I get in the “zone” where my camera becomes an extension of myself and a conduit to my creative mind.. This mindset helps me appreciate the present where creativity is then limitless. For me, street photography is like a walking meditation.

3199e671-8bdf-42ff-a62e-0d16260b5f0d.jpg

How to create a Silhouette: Making a good silhouette photo doesn’t have to be excessively complicated. Though there are some straightforward steps that you should follow to master the art of silhouettes.

The key element in creating silhouettes is understand light.

Here are a few steps to guide you.

1. Point your camera to a bright light spot and set the exposure. (Manual setting here is recommended).

2. Compose the image by applying leading lines and/or the rules of thirds.

3. Wait for a subject to enter or pass between the light and the camera.

4. Concentrate on your subject’s shape. Look for clean shapes

5. Use Zone-Focusing.
(For those who are not familiar with zone focusing, you basically use a high f-stop number with a deep depth of field (f/16 or f/11) and have your camera pre-focused to a certain distance to get your photos in-focus. Using zone focusing when shooting street photography will get you much more keepers.

Newsletter #3 The Spontaneous Art of Street Photography

THE SPONTANEOUS ART OF
STREET PHOTOGRAPHY

REFLECTIONS, OBSERVATIONS AND INSIGHTS
 Newsletter # 3 by Maurice Henri © 2020

6f23c981-de32-4800-a2cc-84881ac31b89.jpg

IN THIS EDITION:

DID YOU KNOW?
REFLECTIONS - Street Photography
OBSERVATIONS - Street Photography
INTRODUCING - ESTAVAN ORIOL - Street Photographer 
ARTQUEST PHOTOGRAPHERS SOCIAL - MEMBER SHOWCASE
CREATE A PHOTO SERIES FOR INSPIRATION
FINAL THOUGHTS - PHOTOGRAPHY AS THERAPY 
INFORMATION AND HAPPENINGS


DID YOU KNOW?
 The First Digital Camera was Invented in 1975.

Steven Sasson invented the world’s first digital camera.
He was working at Eastman Kodak at the time.


fe406d8b-2f85-4286-82ca-a26b8042e43c.jpg

DID YOU KNOW?
HELEN LEVITT

c88663d6-110b-4044-b6bb-9e5eceb0829b.jpg

Helen Levitt - (1913 - 2009) - A founder of the street photography movement who’s been called “the most celebrated and least known photographer of her time,” spent 60 years taking candid photos on the streets of her native New York City. 
Helen Levitt's playful and poetic photographs have delighted generations of photographers, students, collectors, curators, and lovers of art in general.  The New York Times described her as: "a major photographer of the 20th century who caught fleeting moments of surpassing lyricism, mystery and quiet drama on the streets of her native New York". 

Helen Levitt was born in 1913 in a middle-class family of Russian-Jewish parents in Brooklyn, New York. She dropped out of high school and worked for J. Florian Mitchell, a portrait photographer. Commercial photography didn’t interest her. Her true passion was photographing people in their natural environments which she learned from the Film and Photo League.

In 1935, Levitt met and befriended Henri Cartier-Bresson. Inspired by him and his work, she bought a small 35 mm Leica in 1936 and started to take her early street photographs.

In 1937, Levitt visited Walker Evans, and started to grow a friendship with him, James Agee and their friend, the art critic Janice Loeb.

In 1959 and 1960, Levitt received two subsequent Guggenheim Fellowships and started to work in color.

40 of her color street photos were shown as a slide show at the New York Museum of Modern Art in 1974, one of the first times photographs were formally displayed this way in a museum. Her work was also part of the famous “Family of Man” exhibition.

Helen Levitt is one of history’s best street photographers who unfortunately didn’t gain the fame and recognition during her lifetime she deserved. However she was a mostly private woman who followed her passion (which was shooting in the streets).

Very much like Vivian Maier, she shot for herself and aimed to please herself (before pleasing others).

de8a8167-6658-4b2e-b654-f8cf14580d6d.jpg

THE SPONTANEOUS ART OF STREET PHOTOGRAPHY

REFLECTIONS
Street Photography

With street photography, it all comes down to the photographer’s instincts, where no amount of planning can prepare you for what you encounter on the street.

Street photography is one of my favorite and most inspirational type of photography. I find it riveting to watch people and capture fleeting glimpses of lives with my camera. My aim through my photography is not only to to illustrate the human story, but to communicate it.

The realism of street photography is that its not as simple as many may think. Street photography can be quite daunting at first, yet quite exciting once you get your groove and obviously, once the principals of photography and design are understood.
I find street photography both relaxing and challenging, as well as rewarding. I find it a source of enjoyment, excitement, inspiration and a path for conveying thoughts and emotions, but it can also be quite frustrating and disappointing.
No other activity pushes me to learn more, to do more, to understand more and to improve more like street photography. I find the entire process of exploring and capturing the unknown and the unforeseen quite thrilling. And being alert and in the moment underlines the importance of being totally connected with the sites and sounds around me.
Life materializes all around us every second of the day and capturing a momentary fragment in a fraction of a second is for me the obsession. I photograph to explore these moments and try to express their meaning to the viewer.


OBSERVATIONS
Street Photography

I believe to become a better Street photographer you should find role models. 

Robert Frank learned from Walker Evans and Eugene Atget inspired Berenice Abbott. For over a century, street photographers have found inspiration in their predecessors and colleagues. Kameron Sears is a street photographer based in Chicago. He names Robert Frank, along with Vivian Maier, Saul Leiter, Todd Webb and Bruce Gilden as inspiration.

Find someone whose work speaks and inspires you and use that as a point of departure. Seek not to merely look at their work online, but actually acquire their print books and attentively peruse them. I am confident that this will have a much stronger effect in your development than merely scrolling online.

Devote time with images by master photographers and let them enlighten rather than dictate your artistic direction. And of course, you must go out there and do it.

“To me, photography is an art of observation. It’s about finding something interesting in an ordinary place… I’ve found it has little to do with the things you see and everything to do with the way you see them.”
– ELLIOTT ERWITT

THE IMPORTANCE OF THE "MOMENT" IN STREET PHOTOGRAPHY: Capturing the “moment” is the heart and soul of street photography. Although some "moments" will appear before you without warning, other "moments" can be anticipated. You can design a great composition, but an expressive "moment" is the definitive component that creates the energy and the message in your image. Without it, your street photographs will look as if something is lacking.


For example, peoples disposition alters when they know they are being photographed. The most difficult part of street photography is being a discreet bystander and not disrupt the "moment" with your presence. The minute you are spotted, the "moment" is gone and you can no longer capture the honesty of the scene; it becomes false.


ANTICIPATE WHERE YOUR MOMENT WILL HAPPEN: If you have been making street photographs for a while, chances are that you are capable of anticipating where or when your "moment" will materialize. For these instances, make sure you are ready with your camera’s setting established and the design (or composition) is framed in a way that the subject(s) and the "moment" are clear from any distraction.
To really hone in your skills and keep you sharp, you have to know and feel when the timing is right for you to make the image. For that reason, I believe just using a camera in “burst mode” and simply hoping you got something will never get you in the actual "moment.


CAPTURE INTERACTION: I have always been mesmerized in capturing key “moments” in my street work. I am particularly attracted with how people interact with each other. To me, that is what creates special “moments”. I can describe the majority of my street imagery as a glimpse into the existence of other people.
When two or more people are together, 'moments" are more than likely going to happen. That's when you stop or slow down and observe. When it becomes obvious or you feel that something is going to happen, get ready, pay attention to the light, shadows, colours, framing, etc. In these cases, be patient, wait for it and when several subjects are intermingling with one another hit the shutter at the right "moment" to communicate a clear message.


MAKING A CONNECTION: I categorize catching people through my street / candid photography as a “fractional connection” which happens between the subject and myself. Never to become friends or even have a conversation, yet I see it as a intimate moment rooted in time. A special short-lived relationship shared, never to be experience again.
The thrill of street photography (and also the tricky part) is that the objective is to capture a moment without the person or people being aware that you are there. Generally, street photography is more about being inconspicuous and covert than intermingling with people. However, every so often, the subjects will notice you making photographs of them.
At that precise moment, when the subject catches you photographing is very revealing. I not only find that moment to be extremely authentic,I find it very honest. It becomes a fantastic opportunity to actually make eye contact and reveal yourself.
At exactly at that moment, you must unequivocally trust your "gut instincts" because if you are truly connected to the environment you “will know” if you must move on or permitted to stay a little longer and/or create a candid portraits. Trust that the ambiance and the people within the scene will silently communicate with you and give cues. I assure you; if you are dialed in, this is one amazing and personal experience.


REVELING AUTHENTIC LIFE: Street photography is not always about pretty pictures. It's about documenting life, "real life", for better or worst, and real life is not always pretty.
Of course, you want the exposure, lighting and composition to have a good level of quality but in this type of photography, what matters most is to make sure your photos are thought-provoking, and contain emotion, a message or tell a story, positive or negative.
As you wander the streets, be aware and identify the potential a subject or scene can communicate something instead of looking for only prettiness. Try to create compositions that will touch people’s emotions and rouse their curiosity.
Don’t be afraid to create strange, gritty or abstract images. These images are not all about pleasing the judges at your camera club or need to be mounted and framed on your living room wall. Embracing imperfection is fine as life on the streets is not perfect and you do not always have perfect or controlled situations. Every so often, it is those imperfections that make them better photographs and makes them real. These slight imperfections will support the notion that this was unplanned moment in real time.


COLOUR OR BLACK & WHITE FOR STREET PHOTOGRAPHY?
First of all, let us assume that you are shooting with a digital camera and the option of colour or monochrome can be done post-processing. The choice of selecting colour or black & white with film is a different story all together, as you must make the decision before you leave your home. And this will affect your artistic approach, because shooting in colour then turning it black & white later in post is a vastly different visual attitude and mindset than seeing and producing in black & white in the camera on site.
Therefore, this is the questions: Is street photography better in colour or black and white? Well actually, both are good as it is certainly a preferred choice. Some photographers only photograph in colour, others would rather create in black and white.

_____________________________________________________________

There is a saying in photography when it comes to photographing people…“When you photograph people in colour, you photograph their clothes. When you photograph people in black & white, you photograph their souls". I've subscribed to that mind set for decades and it is the reason that a large part of my people imagery is in monochrome. Of course, there are exceptions to the rule, but for the most part my preference is black & white when it comes to people photography. Others may prefer colour and that is fine. As mentioned previously, it’s a personal choice. No wrong or right.

But when facing certain subjects or situations, I will make the judgement call to switch to colour as the option before I release the shutter. Here are some reasons behind that decision and why black and white could be a better choice:

Black & White works well if your subject has a classic look. It will give the image a period feel and offer a more artistic vibe. This becomes much more genuine when nothing in your composition dates the photograph (for instance, mobile phones, automobiles, etc.). Sometimes, black and white processing will even help out in obscuring those elements.

WHEN COLOUR WORKS BEST
When faced with very colourful situations or subjects, I quickly process what I feel will work best between colour and black & white, but by my own personal directives, I have to establish why I selected colour because I am always in a black & white mindset.
It’s not complicated to have a preference; however, it is much more difficult to explain that preference. In time, like me, you will came to see that some images work better in colour or vise versa. Some catch my eye solely because of their colours and through my evaluating process, I conclude that in some instances, visual impact could be lost if shot in monochrome.
 
Here are examples of when (in my opinion) colour works best. Although it could go either way,  in these cases, my preference is the colour image because I think these pictures are worthy of the excitement of colour.

Discovering a colourful background or prop, anticipating the right subject to eventually come into your frame is a terrific way to envision or predict the image. By waiting for something to happen and getting ready for it, you may decide to get the subject in a colour rather than in black and white. But be careful as colour can play an essential role in accentuating or diminishing the visual attention from the subject or message. Keep In mind, colour must not overwhelm, it should accentuate the narrative, not distract from it.


Silhouettes in street photography is a terrific way create visual tension in your images. The contrast with the absence of features in the subject produces mystery. They are simple to make and enjoyable to search for the next time you are exploring with your camera. Usually, silhouette photographs are stronger in black & white than in colour. But silhouette in colour photographs can also carry strong impact.
Here, it is important that the human viewpoint presented should be defined with some separation to identify the outline of the body. Eliminating the colour will bring more attention your subject to make it stand out, particularly if it is small in the composition. The eye will instinctively be drawn to the human form.
The main factor to successful silhouettes is that the subject must be in focus. Keep in mind, you want a defined shape for the reason that you will not have very much detail (or none at all) on your principal subject.
The essential technical component of creating a silhouette is back lighting. You want the background to be brighter than the outline of your subject.


WRAPPING IT UP
Street photography involves practice, the more you go out and photograph, the more your eye, skill and confidence will improve. Perception and intuition are the key factors to tap into and develop over the camera gear. A great street photograph is the result of a good idea, communication and emotion depicted in an uncomplicated way. So, travel, connect with strangers, be sociable and practice.

INTRODUCING ESTAVAN ORIOL - STREET PHOTOGRAPHER

Check out this video of renowned photographer Estavan Oriol, inspired by his father... In my opinion, this photographer embodies the true state of mind of a Street Photographer.  
 
Estevan Oriol is an internationally celebrated photographer, director and urban lifestyle entrepreneur. Beginning his career as a hip-hop club bouncer turned tour manager for popular Los Angeles-based rap groups Cypress Hill and House of Pain, Oriol’s passion for photography developed while traveling the world. With an influential nudge and old camera from his father – renowned photographer Eriberto Oriol – Estevan began documenting life on the road and established a name for himself amidst the emerging hip-hop scene.


ARTQUEST PHOTOGRAPHERS SOCIAL - MEMBER SHOWCASE

JEAN-GUY GALLANT
Saint - Louis, New Brunswick

______________________________________________________________________

I bought my first camera in the early eighties. It was mainly for taking family and vacations photos. As the years went by, I was taking less and less photos. It is only when I retired in 2012 that I decided to by a digital camera and a few lenses. My interest seem to be changing from time to time. I’m not into any special genre but always shoot whatever catches my eye.

Here are a few of my images.
Jean-Guy


CREATE PHOTO SERIES TO INSPIRE "YOU"

Many emerging photographers find that their work takes a distinct leap ahead once they begin working on a photo series as an alternative of only creating standalone (unconnected) images. This is because a well-conceived photo series will provide focus and naturally guide the photographer towards uncovering and defining their own distinctive style. This kind of project is excellent for those looking to create a strong, cohesive look for portfolios (social media or print), gallery exhibits or book publishing.
Another step, when the primary conception is specified, the photography series will be a straightforward go-to project, so a lesser amount of time is dedicated to experimenting and more on actually shooting. This will lead to a large increase in productivity and consequently a higher level of creative imagery.
Naturally, shooting a specific theme has the possibility to become compulsive, but this is precisely what makes these projects so important as a creative project. Consistently going over and over to the same theme influences a photographer to actually cultivate and hone in their talents, discover the parameters of a subject, explore for new viewpoints, make unexpected discoveries and go a little deeper beneath the surface of the subject matter.
 
To get you going, here are a few tips to guide you to create an awesome photo series.
 
1. Search or think for ideas
2. Select a theme
3. Incorporate your interest or point of view
4. implement attainable limits to get to your subject
5. Develop the project by shooting for unique outcomes
6. Think long term

The photos below are from a series of hundreds of images over a few years that became a twenty-five piece exhibit I made many years ago titled:

"RUST NEVER SLEEPS"

For this project, I have been exploring close-up abstraction from rust to produce work that is more about texture, colour and composition and less about a representational subject matter.
For the "Rust Never Sleeps" series, I hunted industrial sites where I could shoot rusted metal where there is often rich visual content to contemplate. There is a fascination in documenting man-made materials, where once constructed, begin a never-ending attempt to return to nature. I chose closely cropped images to remove any contextual reference and give the illusion of a painterly abstract effect.
My goal was to challenge the viewer to appreciate simple details by promoting the simplest elements of lighting, composition and treatment of the subject to present my view in a straightforward yet artistic manner.


FINAL THOUGHTS
PHOTOGRAPHY AS THERAPY


In my many discussions with photographers and with the years of working with Cameras for healing, it has struck me how many view photography as a form of therapy, while also helping them engage with others.
Yet, I know many photography hobbyists who stop photographing when life gets hectic or overwhelming. Because it is a pastime, it can become unimportant or avoidable compared to everything else going on.
But in reality, if photography equates to healing or is therapeutic for you, well then, I think that that's not unimportant and should not be dismissed. Even if you are only taking snap shots that no one will look at, creating those photos is essential if it helps you unwind and avoid stress or other emotional ailments. Particularly now, with all the challenges and uncertainties of what is happening this year. I believe your photography now and more than ever is worth prioritizing if it's connected with your health and wellness.

It is one thing to photograph people. It is another to make others care
about them by revealing the core of their humanness. -
— Paul Strand

Due to the pandemic, many of our events, gathering,
courses and outings are postpone until further notice.

The Montreal & New York Street photography and Grand Manan Documenting Discovery workshop remain a go for now (August, September, October). We are still accepting reservations or inquiries. As we get closer to the date, we will be able to make a decision to postpone or proceed. We will send more information as we know more.


To stay up to date and get more information go to www.artquestphoto.com

d1b88d71-ee59-4cf4-87ae-e1fbd6527634.jpg
19be5968-914f-4683-ab6e-3aeeab07df9f.jpg
9bb7e74c-f8ec-413c-867d-125dd4f4fcb3.jpg
1f639f77-add5-4411-bc00-0835068943c4.jpg
a3e6a442-d51a-4e9d-b892-abc1f4c06dbe.jpg

We had our first installment of Art Talks / L'art Parle on ZOOM conferencing with photographer Freeman Patterson. We had very good attendance by people from many parts of the world - Canada, USA, Israel, Australia, New Zealand and South Africa.
 

Stay tuned for our next Art Talks / L'art Parle event. Featured artist to be announced.
 

Art Talks events are: Intimate conversations dedicated to presenting a platform of photographic artists and thinkers to stimulate thought and inspire creativity.


Maurice Henri Photography 2020 ©
 

Reflections, Observations and Insights is an information Newsletter sent quarterly.
If you are interested in receiving it, please email or private message me your name and email address. Thank you for your interest.

The content of this email is intended for the recipients specified in this subscribed group only. It is forbidden to share any part of this message with any third party, without a written consent of the author.

This message is sent to you because your email address is on our subscribers list. If you are not interested in receiving more emails like this one, just hit Unsubscribe.